Part 1: Vision Pipeline
Goal: Get a computer vision pipeline working.
Skills: Connect a machine to Viam, configure components in the Viam UI, configure services in the Viam UI.
Time: ~15 min
Prerequisites
Before starting this tutorial, you need the can inspection simulation running. Follow the Gazebo Simulation Setup Guide to:
- Build the Docker image with Gazebo Harmonic
- Create a machine in Viam and get credentials
- Start the container with your Viam credentials
Once you see “Can Inspection Simulation Running!” in the container logs and your machine shows Live in the Viam app, return here to continue.
What you're working with
The simulation runs Gazebo Harmonic inside a Docker container. It simulates a conveyor belt with cans (some dented) passing under an inspection camera. viam-server runs on the Linux virtual machine inside the container and connects to Viam’s cloud, just like it would on a physical machine. Everything you configure in the Viam app applies to the simulated hardware.
1.1 Find Your Machine Part
In the Viam app, make sure the Configure tab for your machine is selected.

Your machine is online but empty. To configure it, you’ll add components and services to your machine part. A machine part is the compute hardware for your robot. In this tutorial, your machine part is a virtual machine running Linux in the Docker container.
Find inspection-station-1-main in the Configure tab.
1.2 Configure the Camera
You’ll now add the camera as a component.
Add a camera component
To add the camera component to your machine part:
- Click the + button and select Configuration block
- Search for
gz-camera - Select
gz-camera:rgb-camera - Click Add component
- Enter
inspection-camfor the name - Click Add component

Configure the camera
To configure your camera component to work with the camera in the simulation, you need to specify the correct camera ID. Most components require a few configuration parameters.
In the JSON Configuration section, add:
{
  "id": "/inspection_camera"
}
Click Save in the top right

What happened behind the scenes
You declared “this machine has an attached camera called inspection-cam” by editing the configuration in the Viam app.
When you clicked Save, viam-server loaded the camera module which implements the camera API for the specific model of camera we are using.
It also added a camera component, and made the camera available through Viam’s standard camera API.
Software you write, other services, and user interface components will use the API to get the images they need.
Using the API as an abstraction means that everything still works if you swap cameras.
1.3 Test the Camera
Verify the camera is working. Every component in Viam has a built-in test card right in the configuration view.
Open the test panel
- You should still be on the Configure tab with your
inspection-camselected - Look for the Test section at the bottom of the camera’s configuration panel
- Click Test to expand the camera’s test card
The camera component test card uses the camera API to add an image feed to the Viam app, enabling you to determine whether your camera is working. You should see a live video feed from the simulated camera. This is an overhead view of the conveyor/staging area.

Checkpoint
Your camera is working. You can stream video and capture images from the simulated inspection station.
1.4 Add an ML Model Service
Now you’ll add machine learning to run inference on your camera feed. You’ll configure two services:
- ML model service—Loads a trained model for the inference task
- Vision service—Connects the camera to the ML model and returns detections
Create the ML model service
- Click + next to your machine part
- Select Configuration block
- Search for
tflite - Select
tflite_cpu/tflite_cpu - Click Add component
- Name it
model-service - Click Add component

Select a model from the registry
Configure the model-service ML model service you just included in your configuration.
In the
model-serviceconfiguration panel, click Select modelSearch for
can-defect-detectionand select it from the list (a model that classifies cans as PASS or FAIL based on defect detection)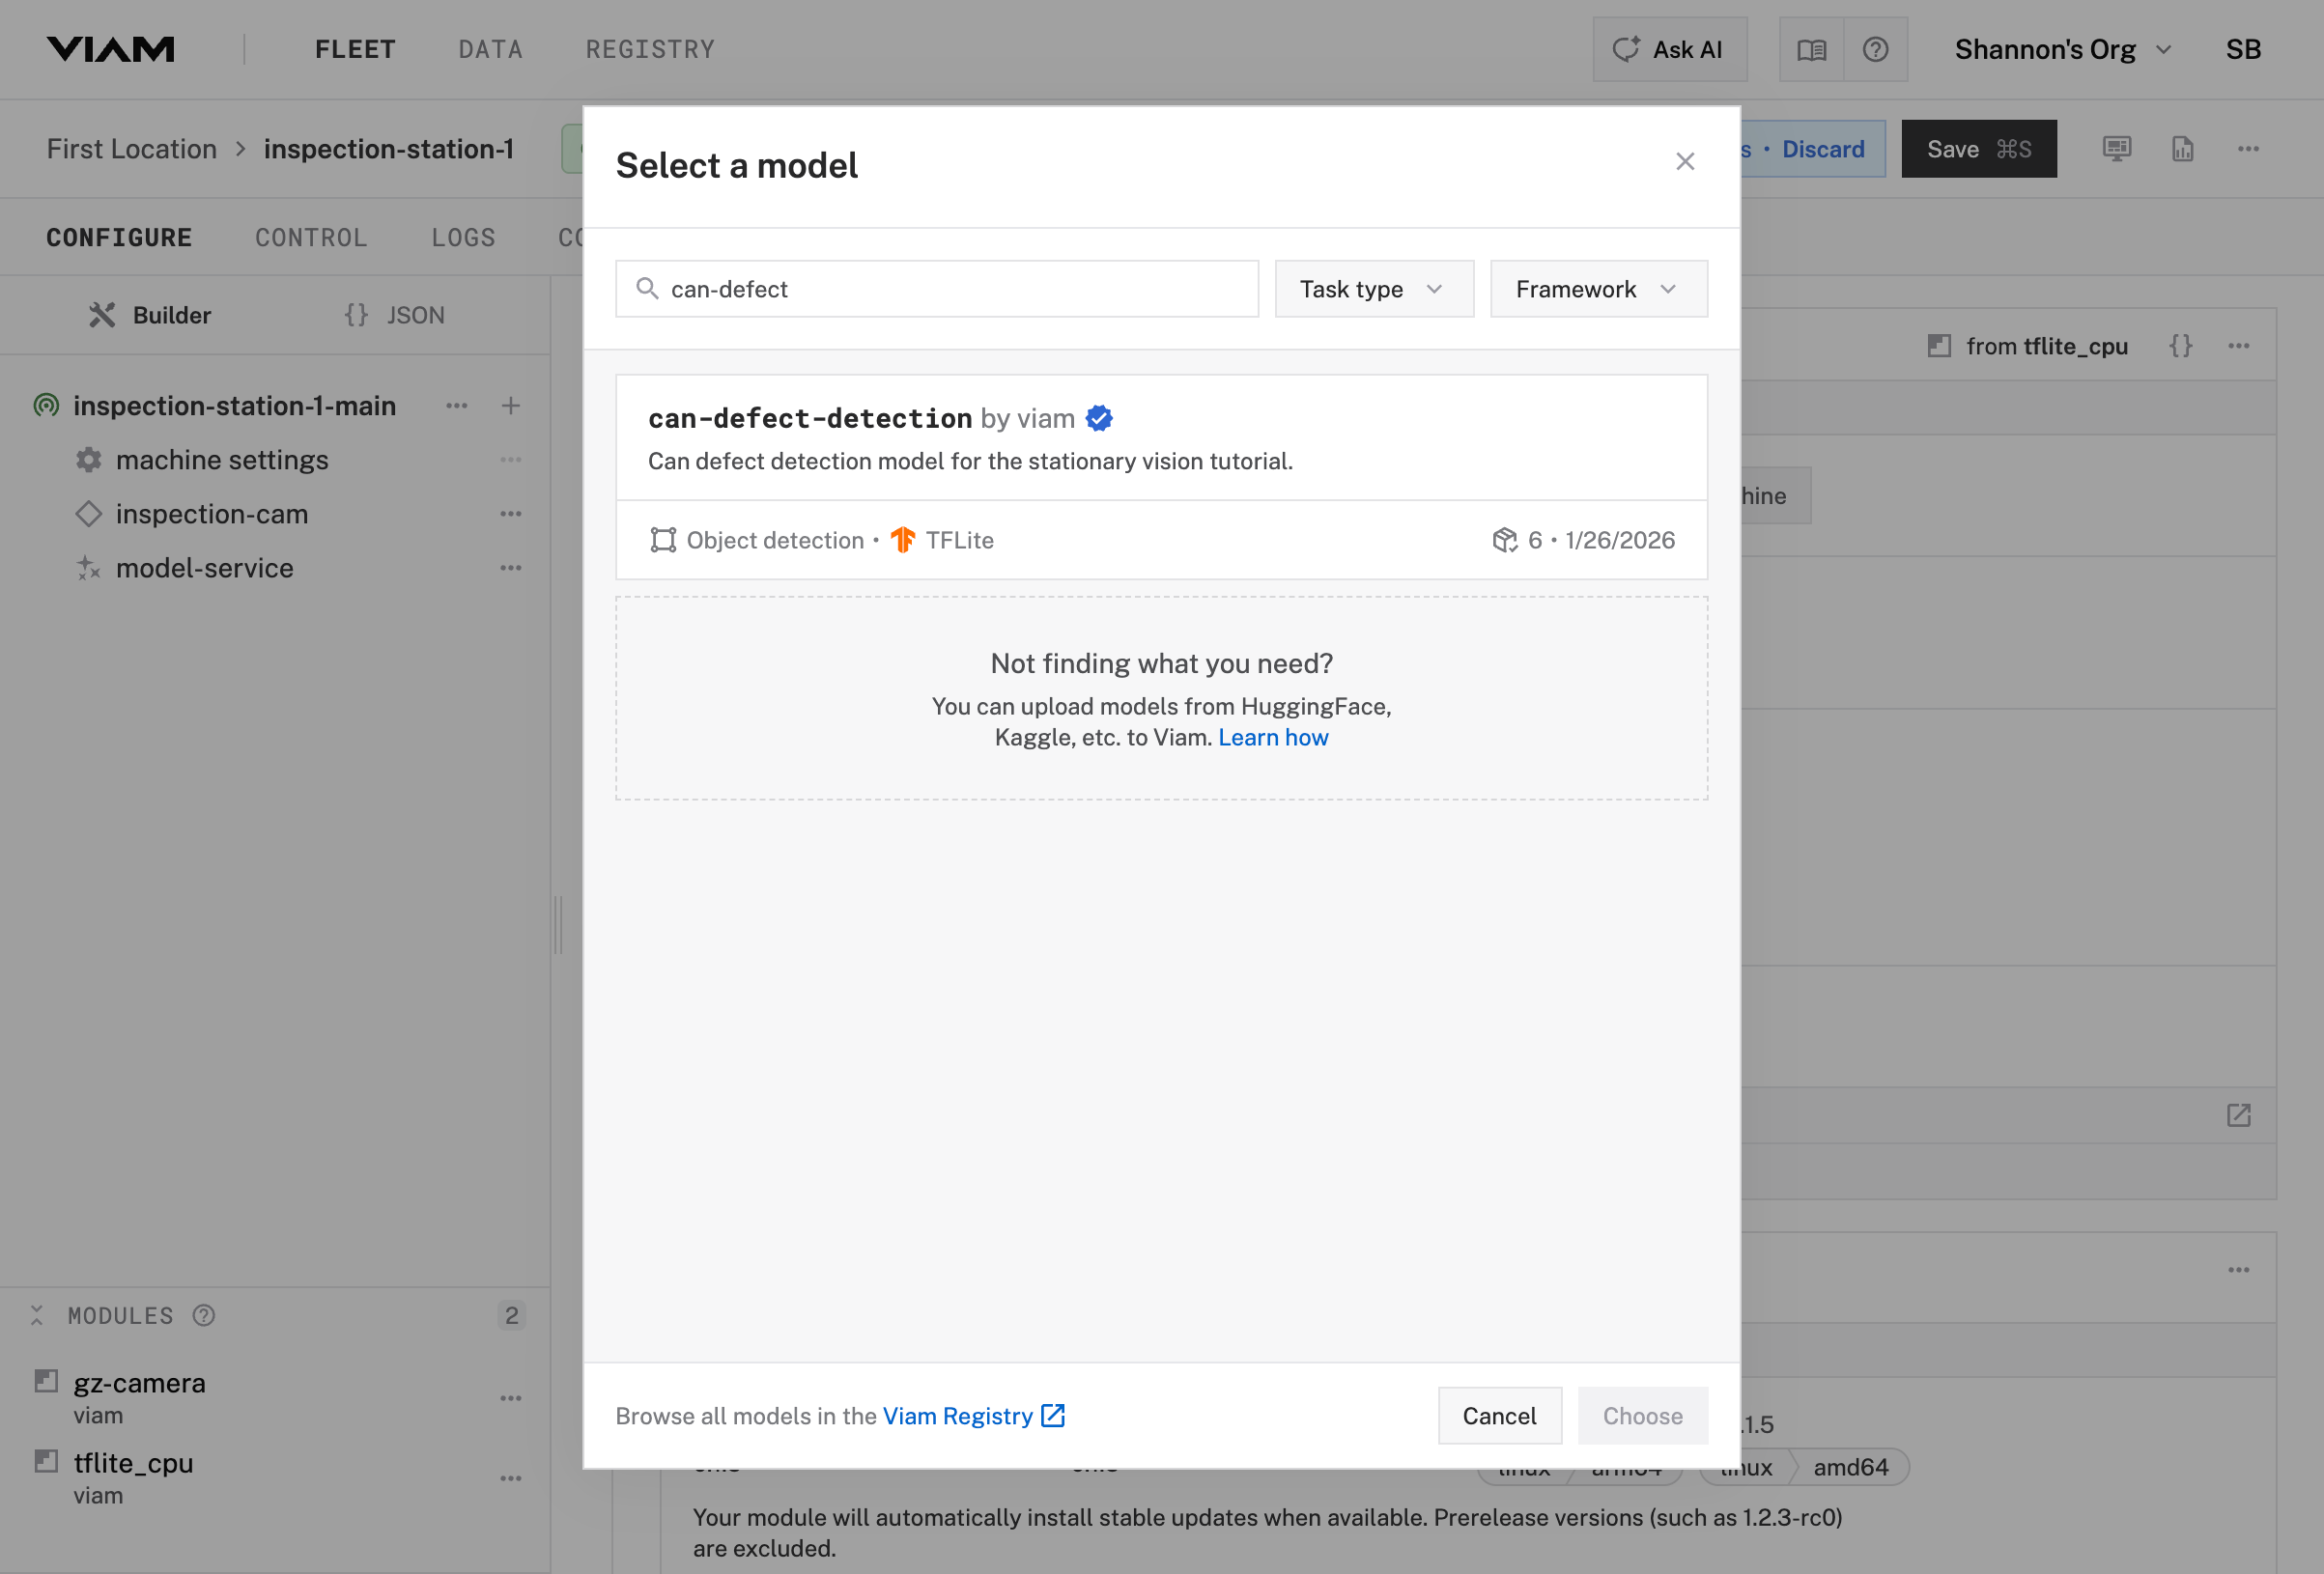
Click Choose to save the model selection
Click Save in the upper right corner to save your configuration

Your own models
For a different application, you’d train a model on your specific data and upload it to the registry. The registry handles versioning and deployment of ML models across your fleet.
1.5 Add a Vision Service
Now add a vision service that connects your camera to the ML model service.
Create the vision service
- Click + next to your machine part
- Select Configuration block
- Search for
vision - Select mlmodel
- Click Add component
- Name it
vision-service - Click Add component

Link the camera and model in the vision service
- Select the
vision-serviceservice in your machine’s configuration - Find the ML Model dropdown and select
model-service(the ML model service you just created) - Find the Default Camera dropdown and select
inspection-cam - In the Attributes section, set Minimum confidence threshold to 0.75
- Click Save in the upper right corner

Test the vision service
- Find the Test section at the bottom of the
vision-serviceconfiguration panel - Expand the Test card
- If not already selected, select
inspection-camas the camera source - Set Detections/Classifications to
Live - Check that detection and labeling are working

Checkpoint
You’ve configured a complete ML inference pipeline that can detect defective cans.
The ML model service loads a trained model and exposes an Infer() method, while the vision service handles the rest—grabbing images from the camera, running them through the model, and returning structured detections with bounding boxes, labels, and confidence scores.
This pattern works for any ML task. Swap the model for object detection, classification, or segmentation without changing the pipeline. You can also swap one camera for another with one configuration change.
Next, you’ll set up continuous data capture so every detection is recorded and queryable.
Continue to Part 2: Data Capture →
Was this page helpful?
Glad to hear it! If you have any other feedback please let us know:
We're sorry about that. To help us improve, please tell us what we can do better:
Thank you!